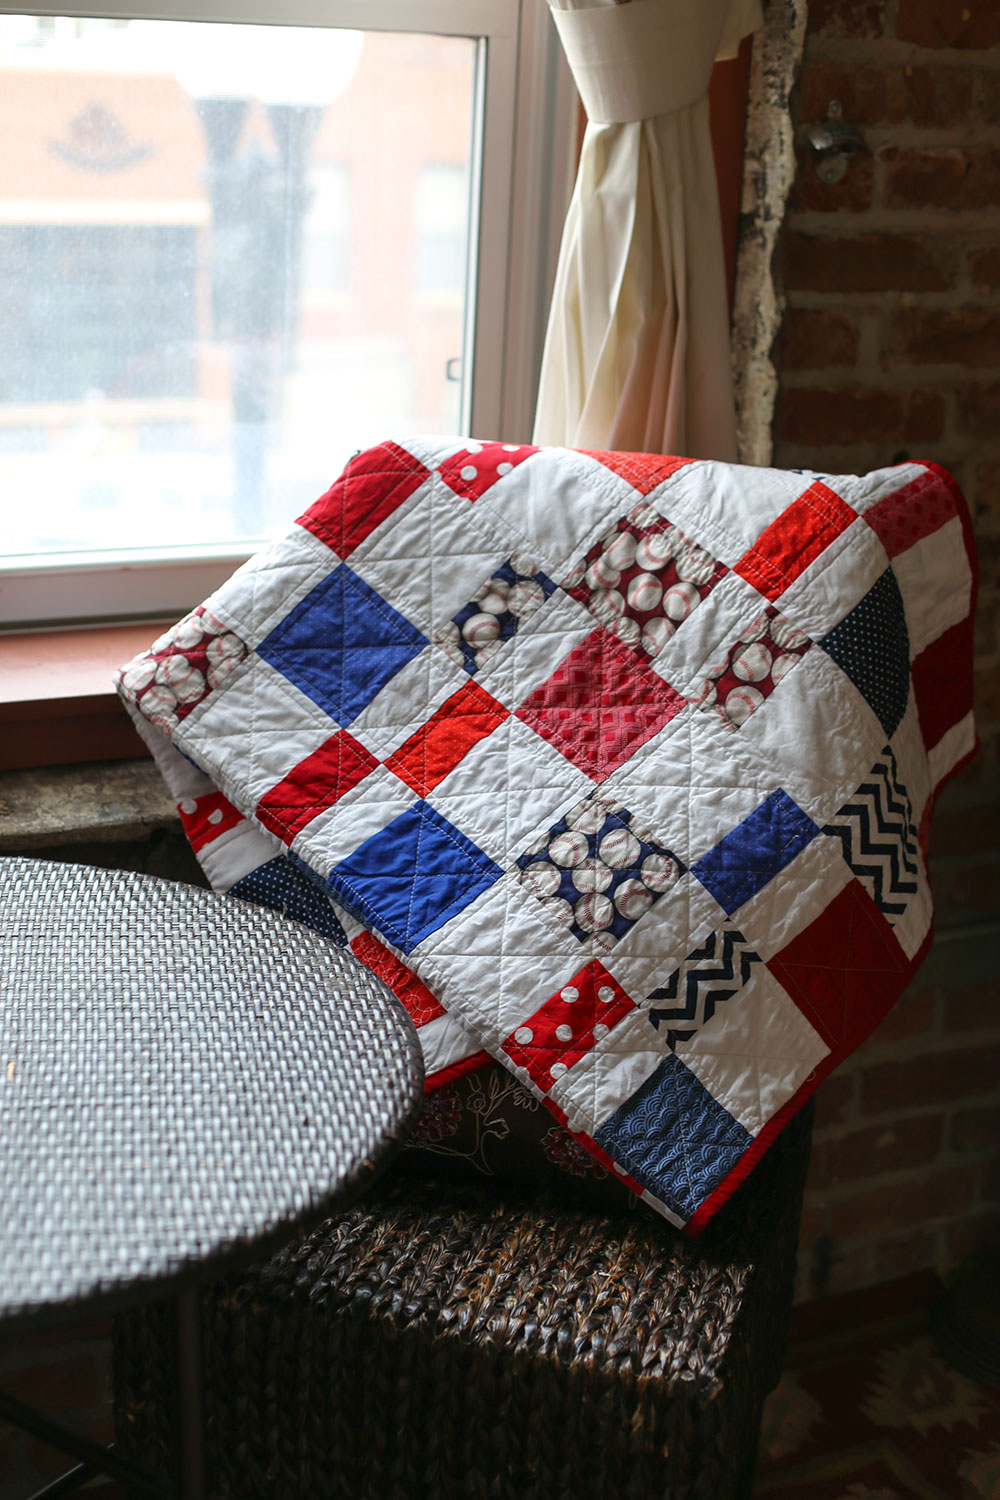


I’ve done very little sewing since we’ve returned from France but I was able to find a little time to finish this baseball themed baby quilt for baby Everett!


I’ve done very little sewing since we’ve returned from France but I was able to find a little time to finish this baseball themed baby quilt for baby Everett!
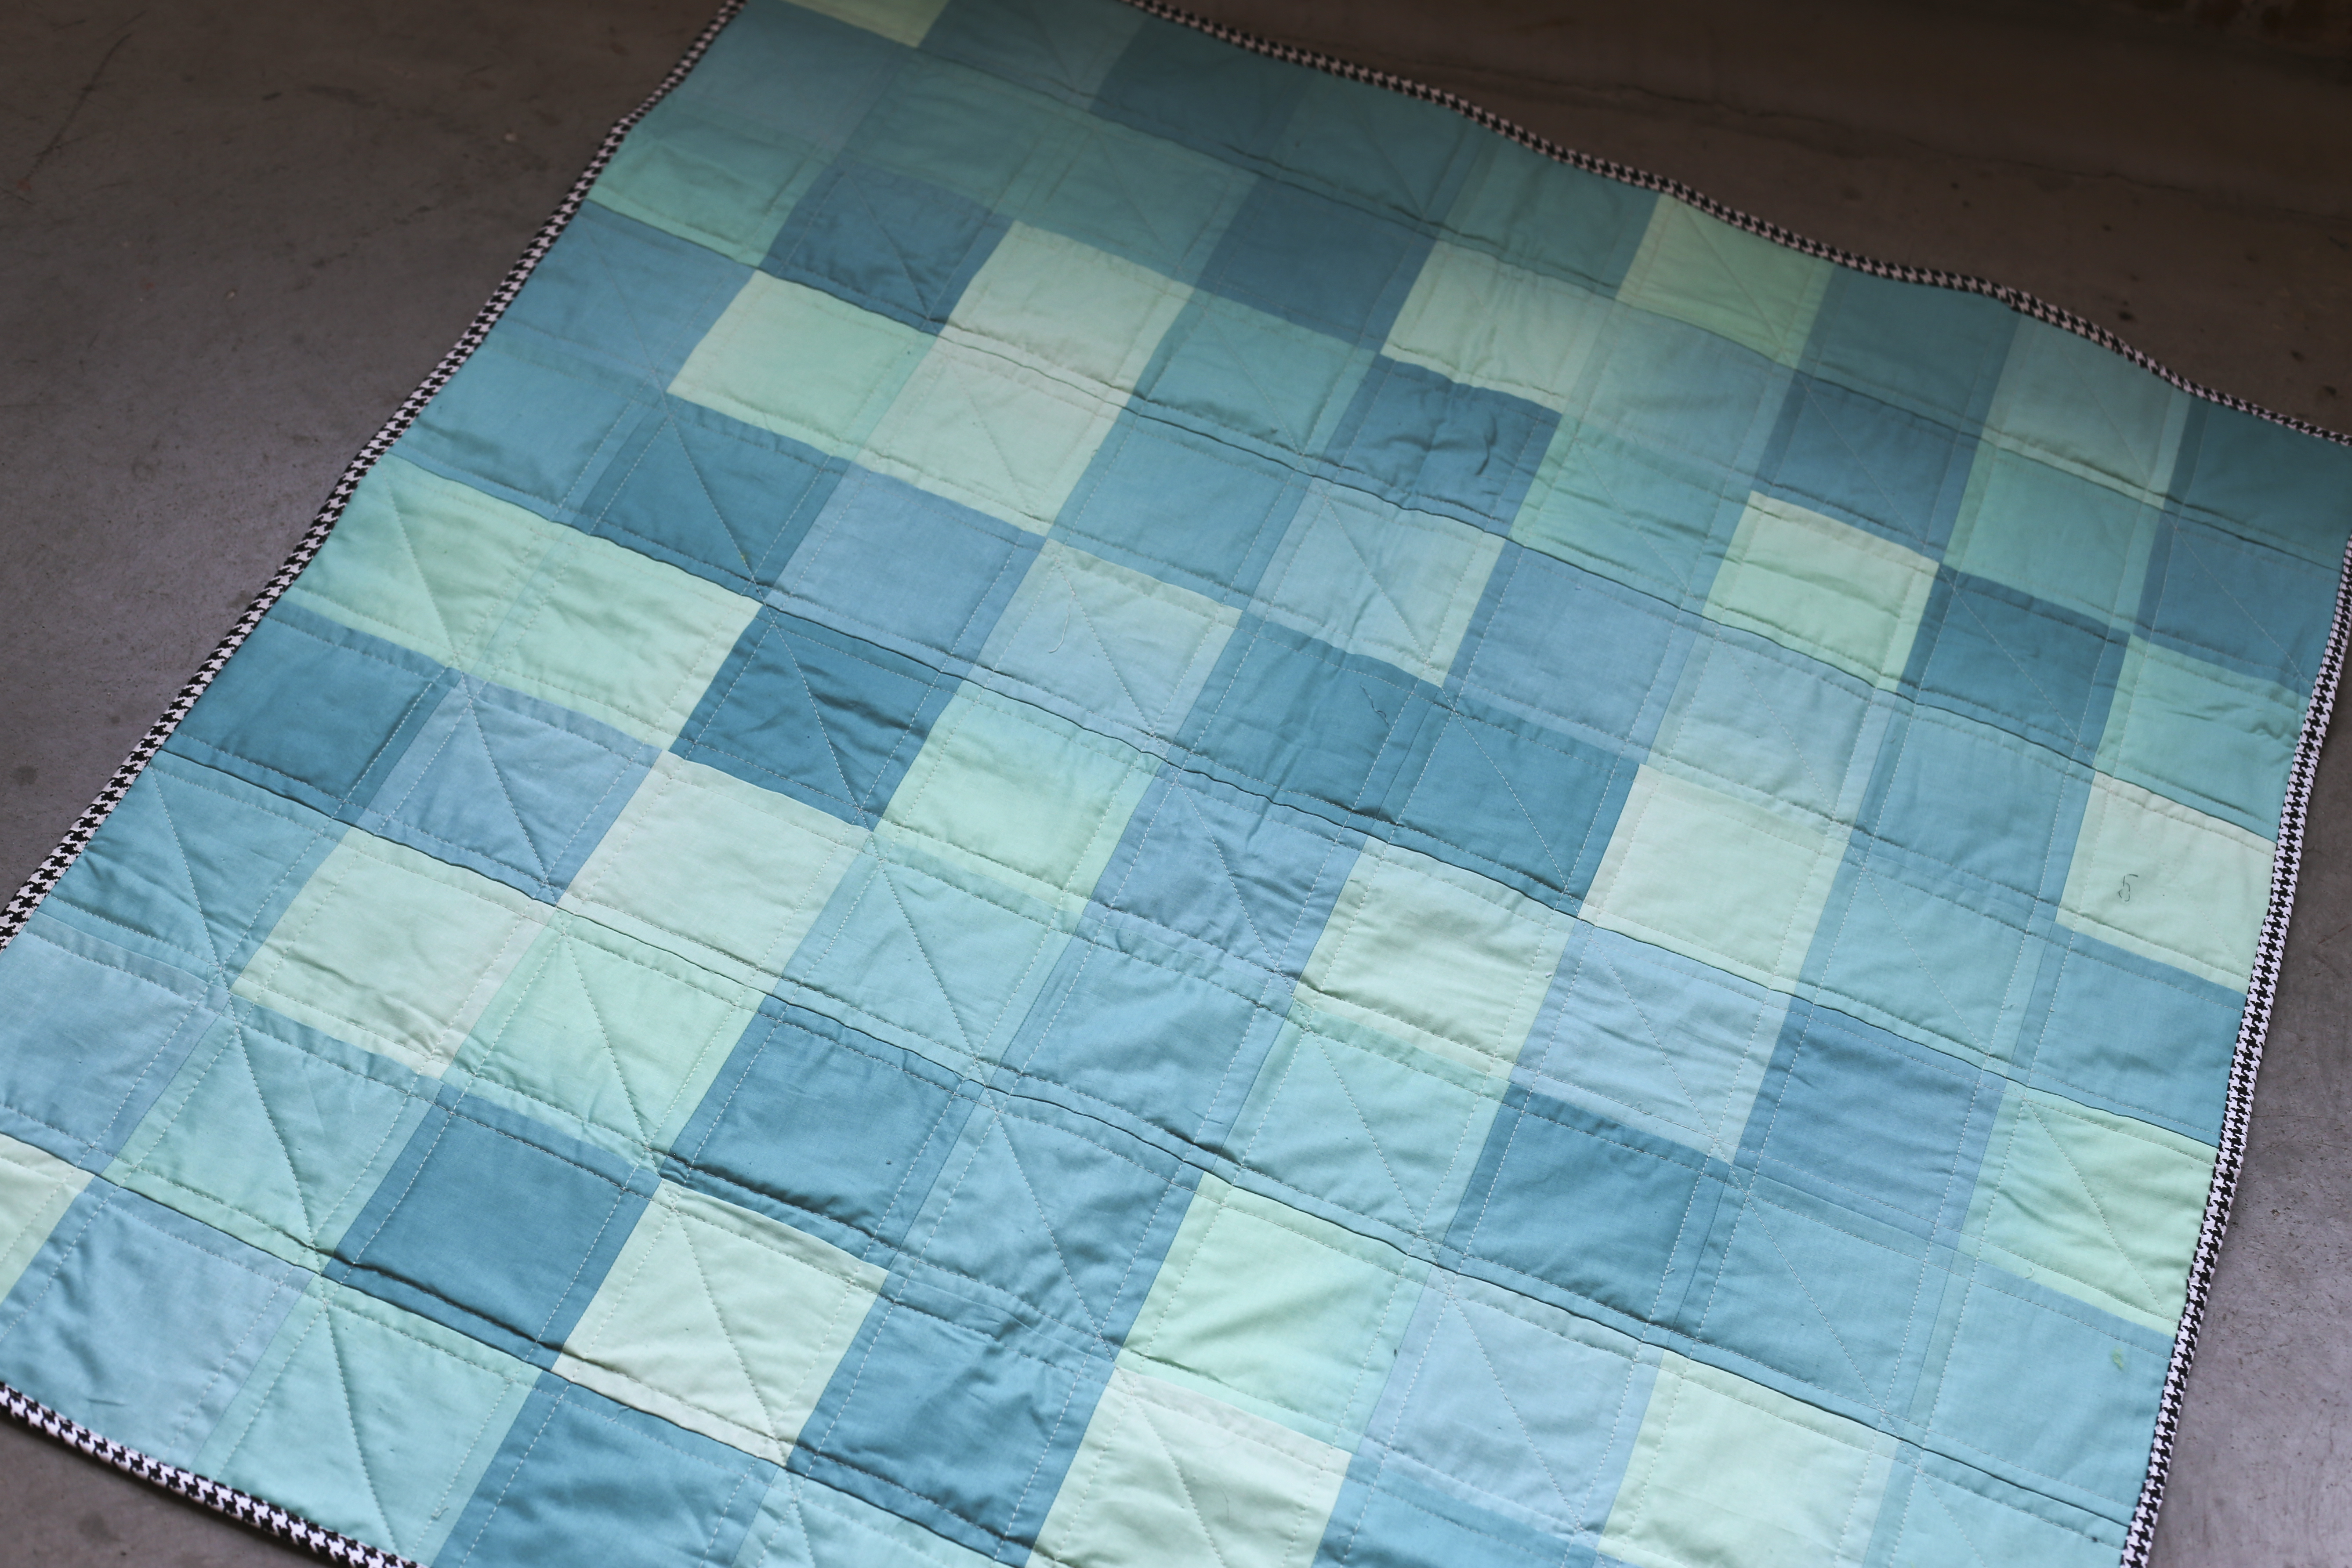

Newest quilt. This one was given to baby Kulik, due this summer. Can’t wait to meet the little guy!
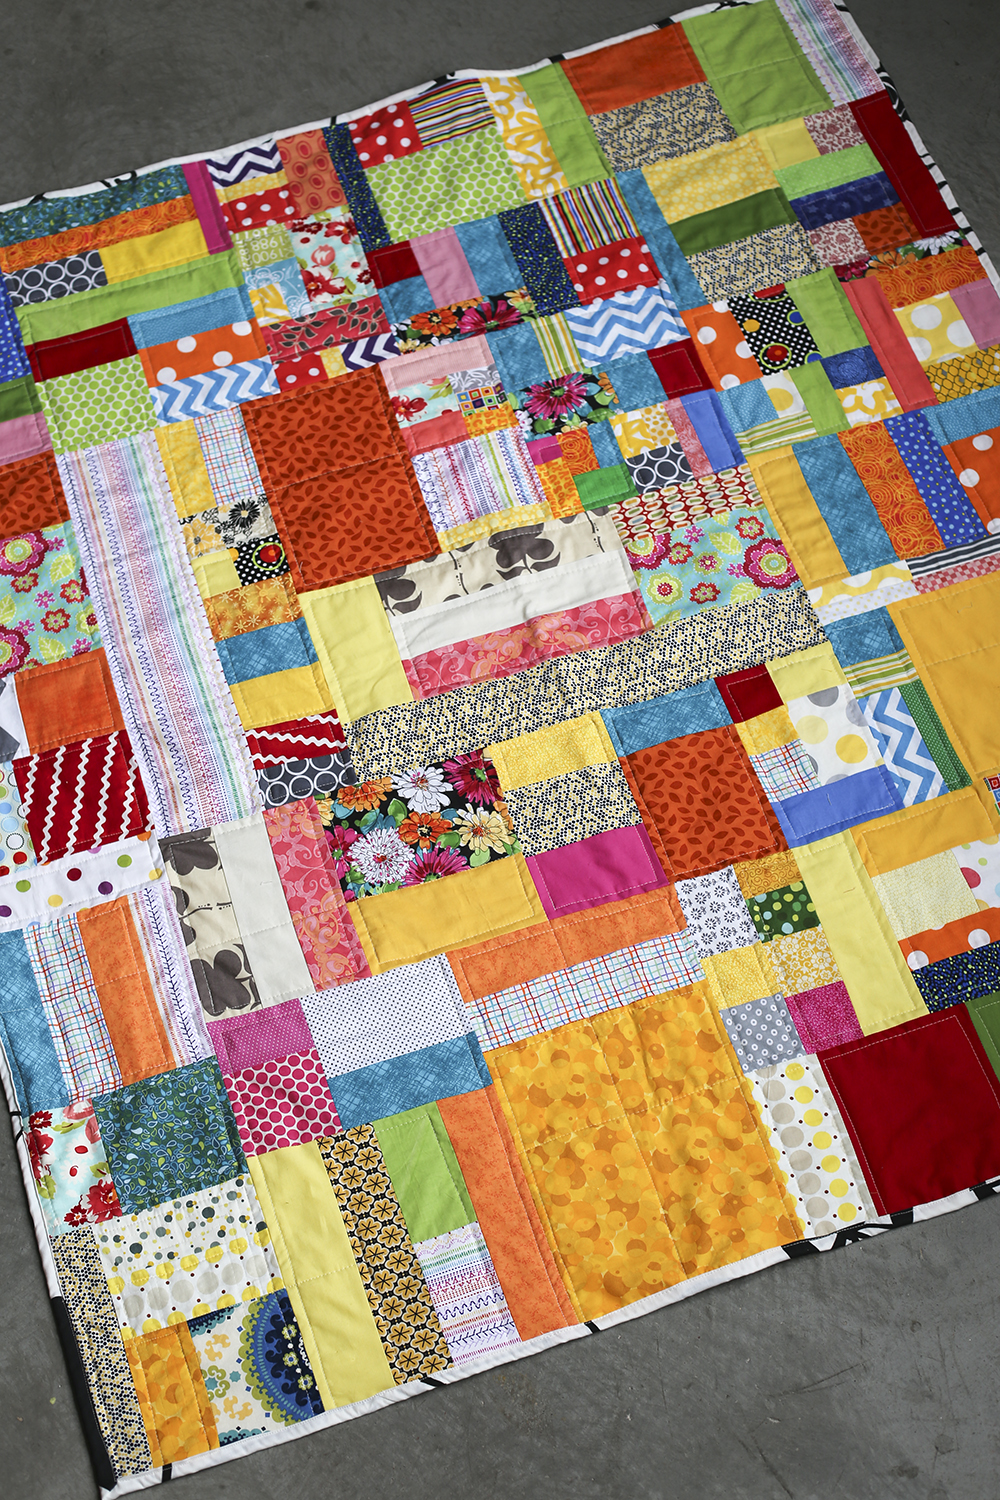
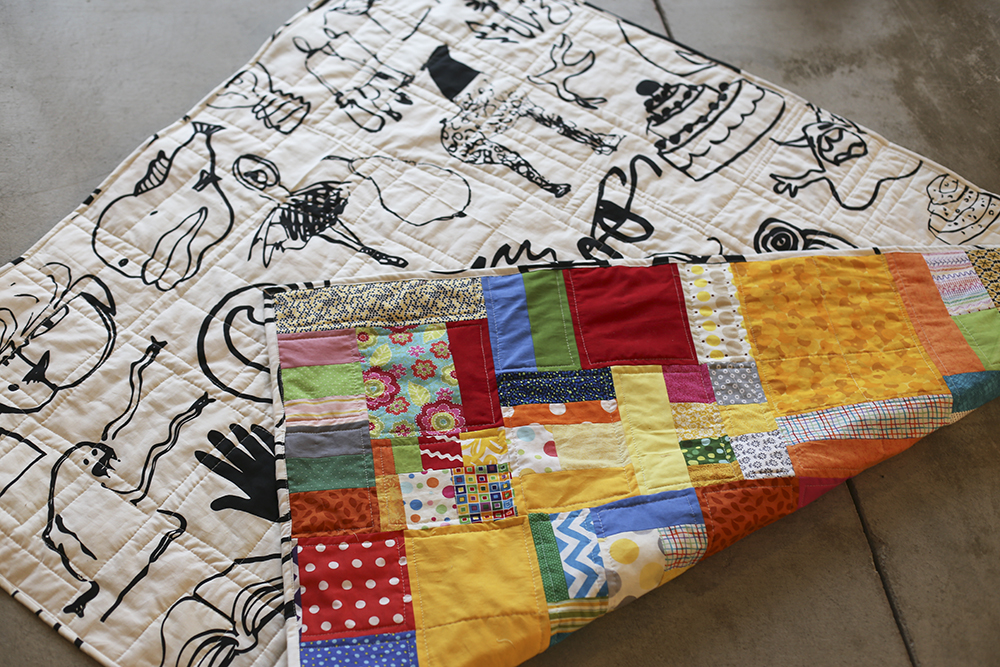


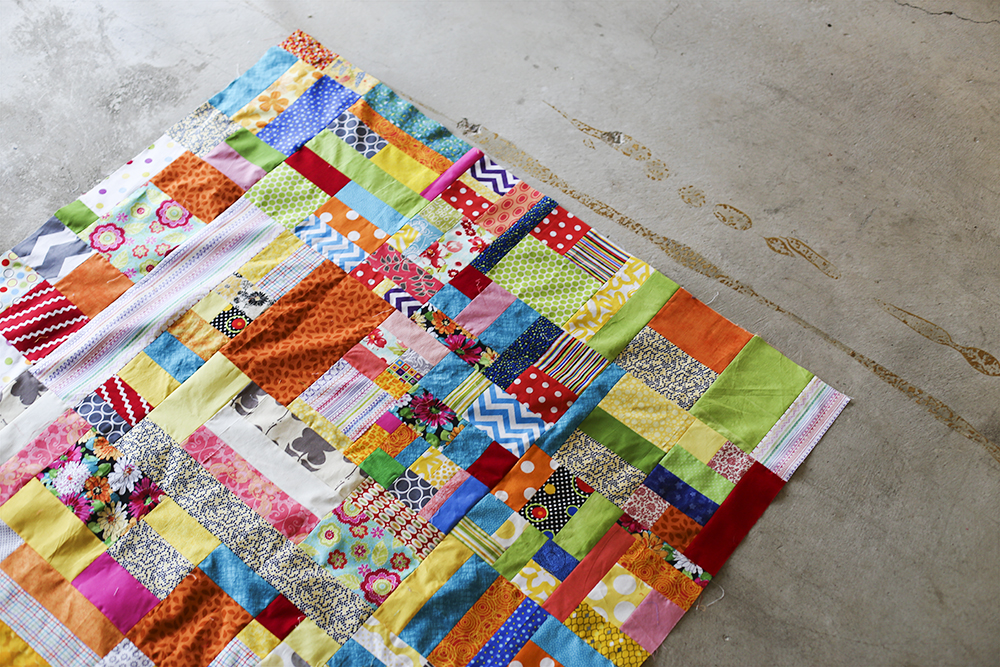
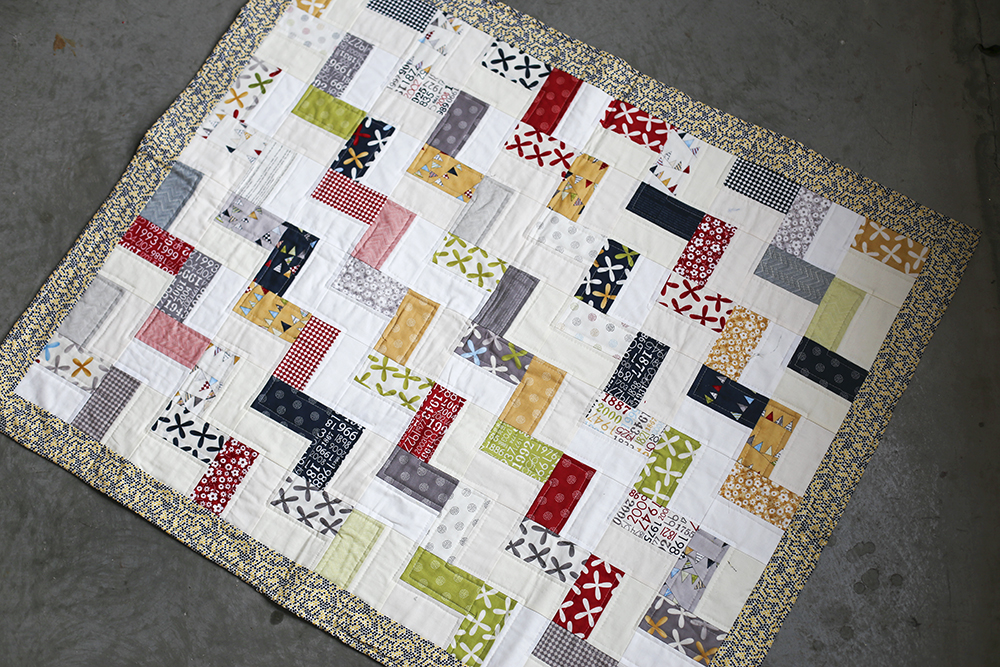
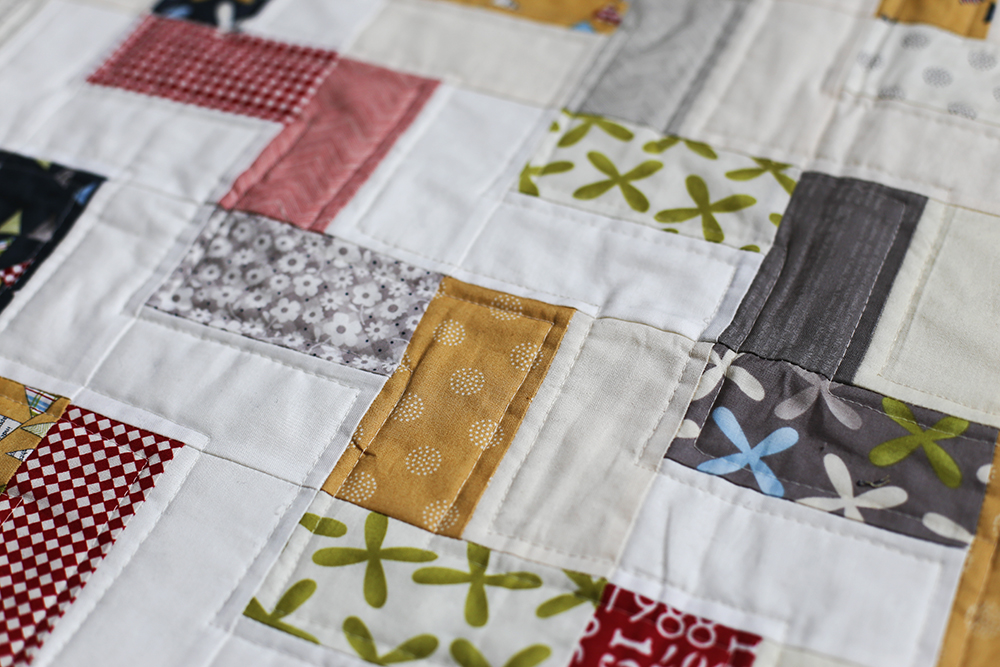
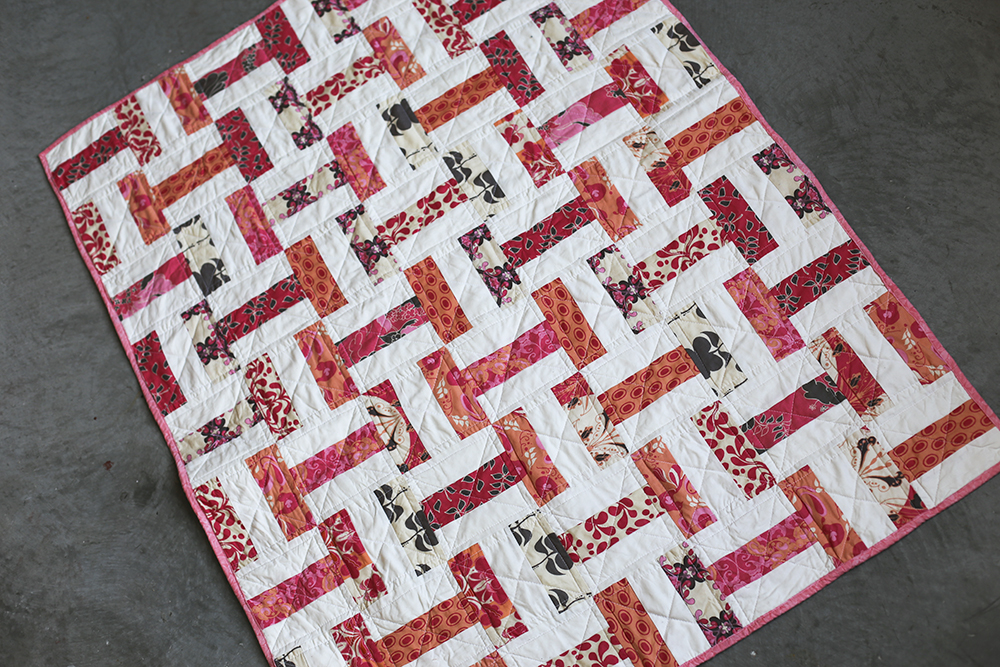
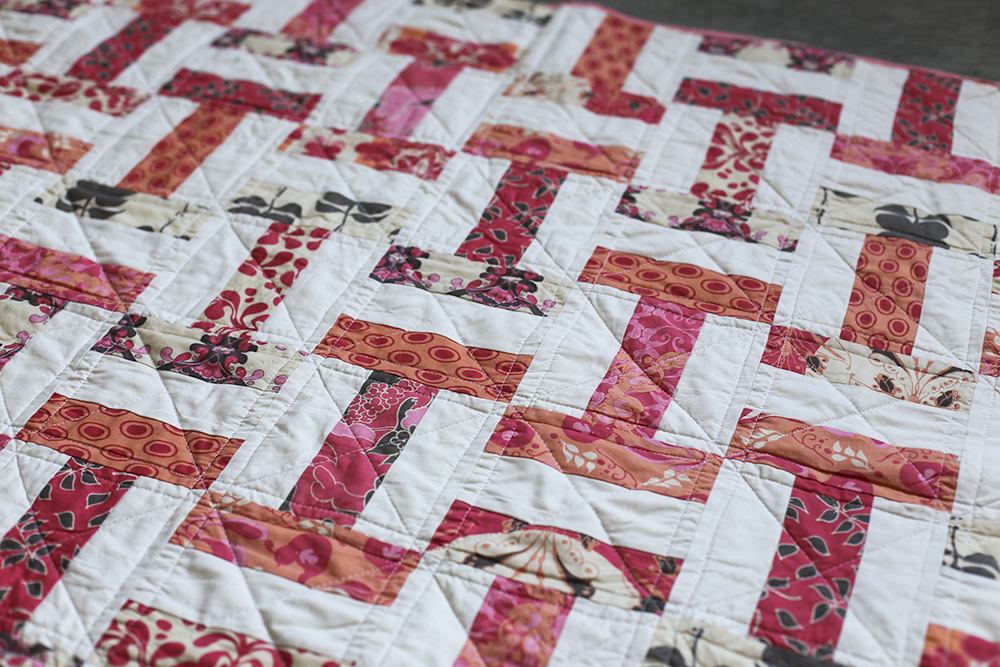
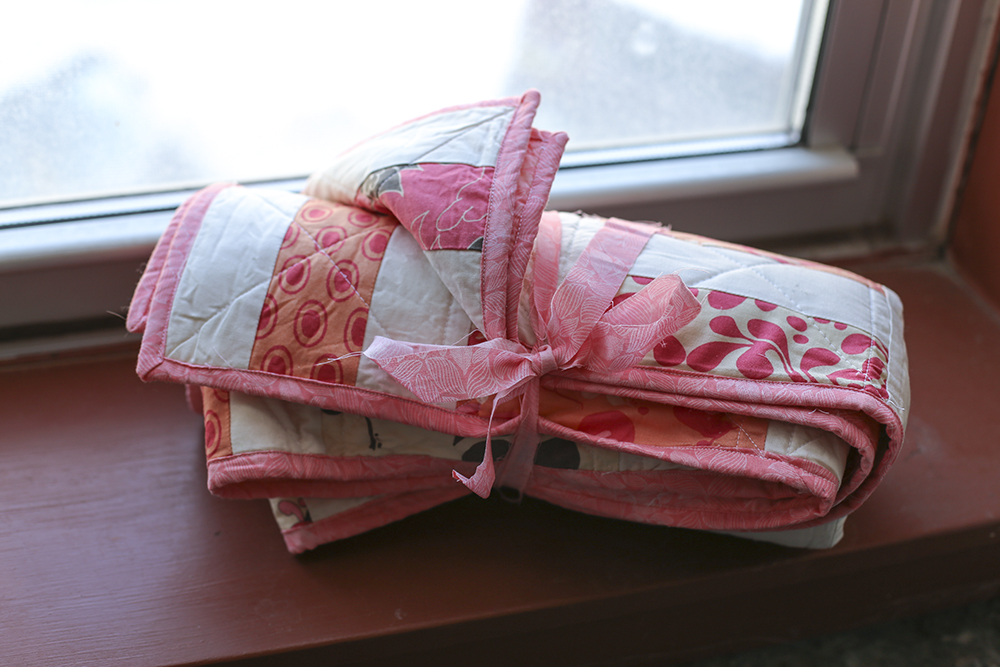
Here’s another quilt I’ve been working on these past couple of months. I took the scraps I had from all of the quilts I’ve done and started sewing! I love looking at all of the different fabrics and remembering the original quits they were used for. I used fabric from Ikea for the back and binding.

With Annabelle going to a Montessori daycare I’ve been reading about what kind of educational approach Montessori education takes. While scouring the internet I saw some great toys that I thought I could sew. I thought sensory bags would be great for her at this age.
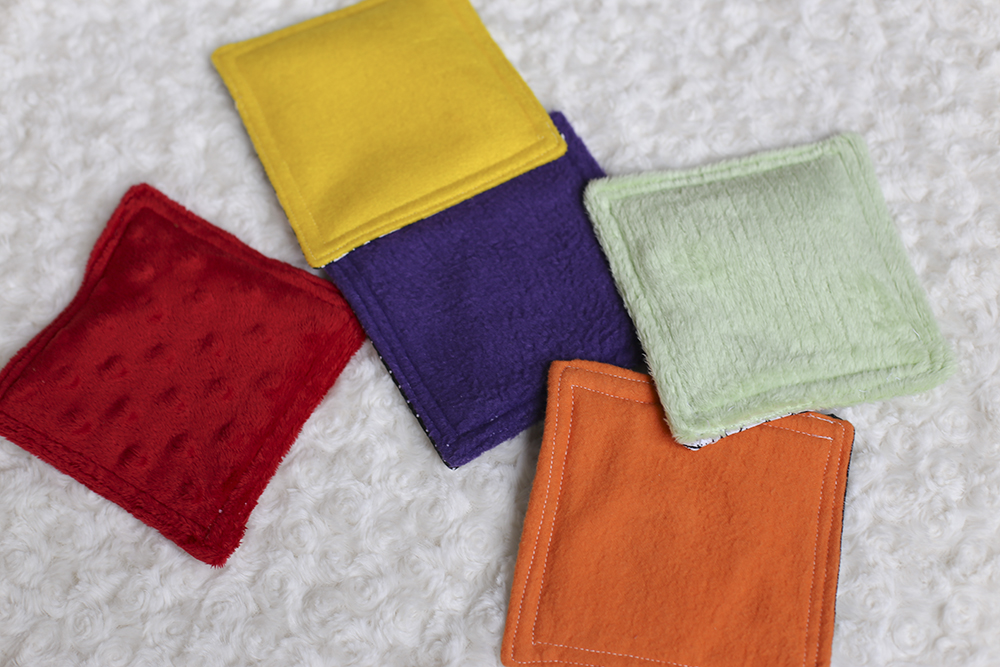
Each sensory bag is a different color and fabric, designed to stimulate the visual and tactile senses. On the opposite side of the bags are black and white patterned fabric. Each of the bags are filled with something different to encourage exploration. They say these bags are great for color learning, touch discovery, and hand/eye coordination. Right now Annabelle’s favorite squares are those with really textured fabrics and that make some kind of noise. And later on she’ll be interested in the ones with other types of materials. I personally think they’re great because they’re simplistic toys that have endless possibilities and they were made by me.
Materials you will need:

Step 1. Find and cut out fabric. I found 10 different colored fabrics (pink, red, orange, yellow, green, blue, purple, brown, gray, black) in a variety of different textures including cotton fabric, corduroy, chenille, flannel, dot minky, fleece, etc. I also searched my fabric stash and found all of the black and white patterned cotton fabric. Each bag ends up being 5″ x 5 “, so I cut each of the colored fabric, black and white patterned cotton fabric, and quilt batting square 5.5″ x 5.5”. In the end I have 10 different colored squares, 10 black and white squares, and 10 square pieces of batting.
Step 2. Assemble squares. I stacked each of my squares to prepare them for cutting. The easiest way for me was to stack a black and white square to one of the colored fabrics, right sides together. Then I put a quilt batting square on the bottom so that when layered it went quilt batting, colored fabric and then black and white fabric. I found this easiest to sew. Make sure to pin all three layers together.
Step 3. Next, sew three and a half sides together with a quarter inch seam. Once you’re done sewing you need carefully cut the corners so that when you turn everything right side out the corners lay nicely. Now, turn your bag right side out so the quilt batting is in the middle and the colored fabric and black and white fabric is on the outside. I used a mechanical pencil to make sure the corners came to a T.
Step 4. Iron squares to help them lay flat. I also ironed the edge that wasn’t sewing under so that it would be easier to sew later.
Step 5. Fill square with filling (small bells, lima beans, pop corn, lentils, poly fill, kidney beans, garbanzo beans, leftover fabric, leftover chip bag, plastic bag, etc.). I wanted to find 10 different fillings to give Annabelle 10 different sensory experiences so I went as far as to wash out a leftover bag of chips and cut it into a square that could fit into a bag. Annabelle really likes things that make noise right now so I bought small bells at the craft store to put into one of the bags as well. Be careful when filling the bags because you’ll be sewing around the outside of the square so I always tried to keep everything in the center of the bag, making it easier to sew.
Step 6. The final step is to sew the square together. After filling a bag with one of your fillings, sew as close to the edge of the fabric as possible to close the entire bag. Then go back and sew a quarter of an inch to a half inch from the edge of the bag to give it a nice finished look.

Materials you will need:
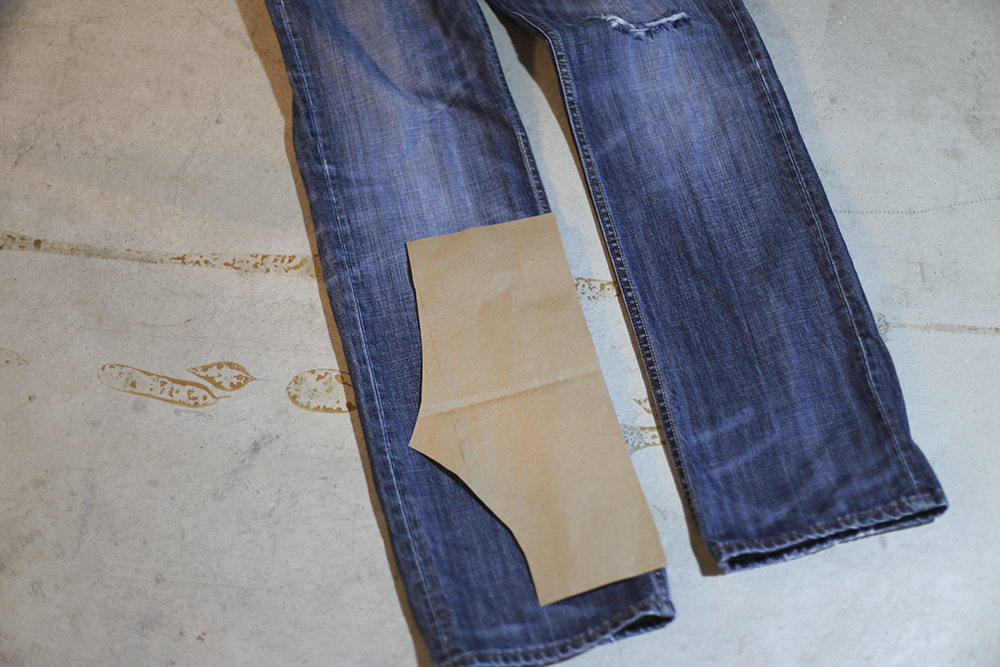
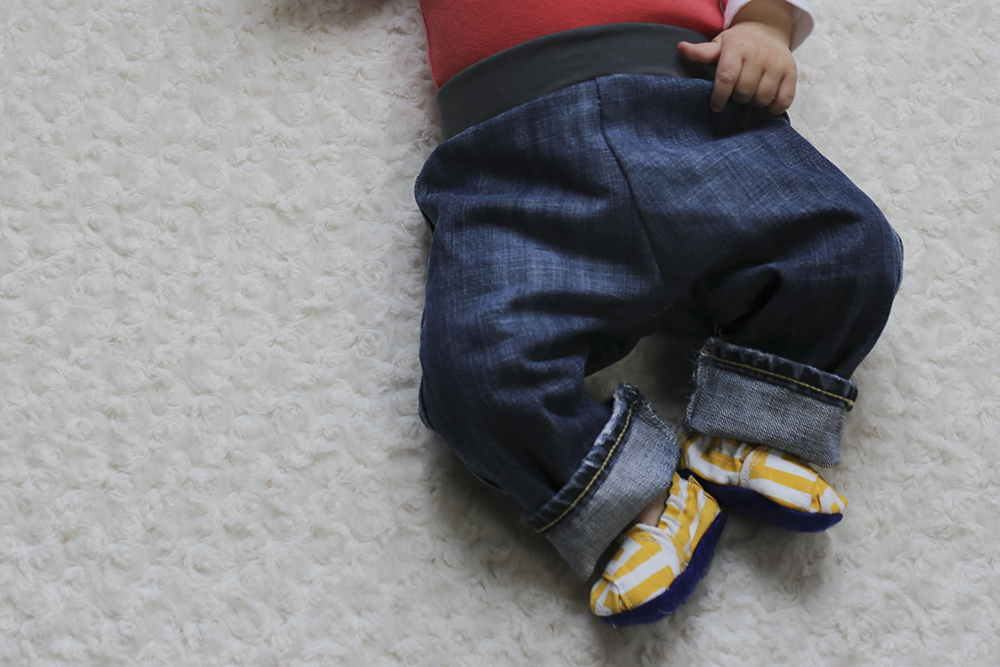
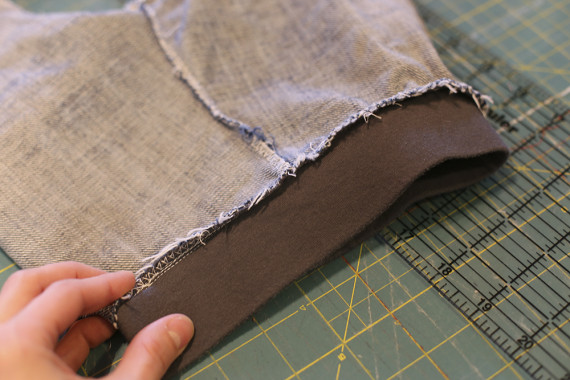
Step 1. Start by making a pattern from a pair of child’s pants. I used a brown paper sack to make my pattern so that was sturdy and I could use more than once. I would suggest making the long side of the pattern straight so you can use it on the fold of your old jeans where there’s a nice seam already on the jeans.
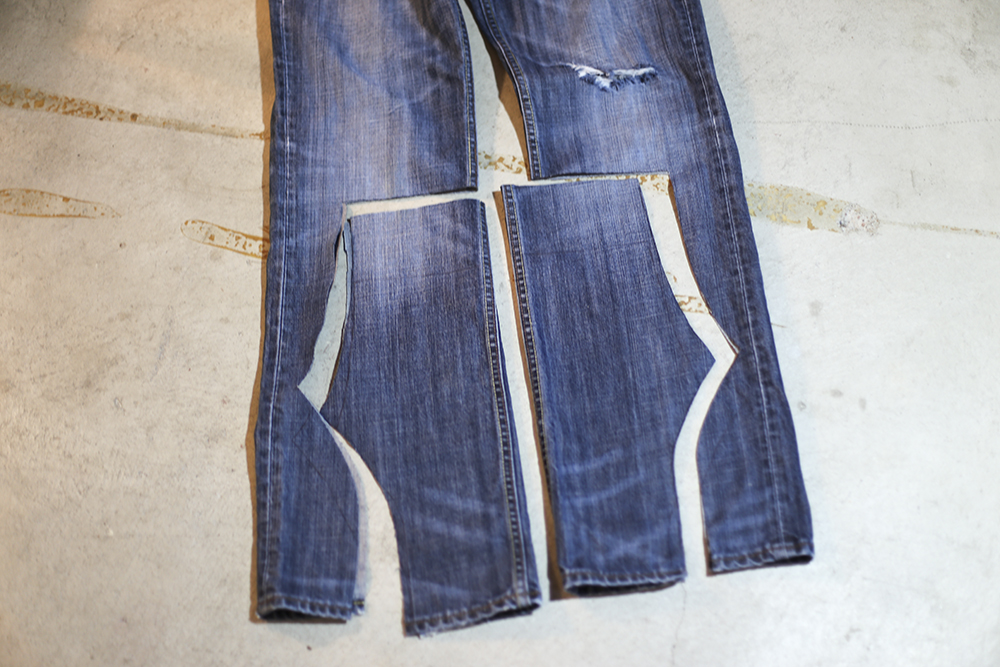
Step 2. Arrange the pattern on the inside or outside fold of the leg of the jeans. I chose the inside seam because the inside has a thick seam and I thought it gave the jeans a more realistic look. These jeans had a rip in them so I had to make sure that the pattern wasn’t on top of the rip. If they were just an old pair of jeans I could have made two pairs of baby jeans. For these jeans I took advantage of the bottom hem of the original jeans so I wouldn’t have to hem the baby jeans at the bottom. I made the jeans extra long too so that I could fold them over. Cut two legs.
Step 3. Now you need to sew the 2 denim leg pieces right side together. I found it easiest to put the crotch and butt seams together and sew this first. To prevent the material from fraying I went back and used a basic serger stitch on the edge where I had just sewn. Once you’ve done this you need to open the pants, match the legs, and sew up the leg seams. Start at the end of one leg and sew up the leg, past the crotch and onto the other leg, stopping at the end of the other leg. Again, to prevent the material from fraying I went back and used a basic serger stitch on the edge where I had just sewn.
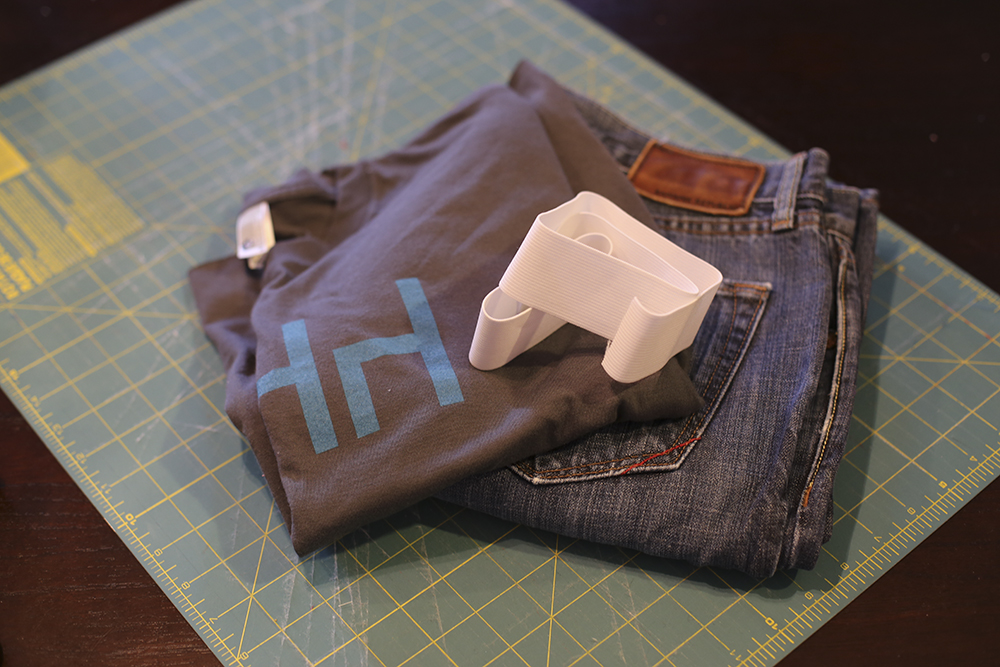
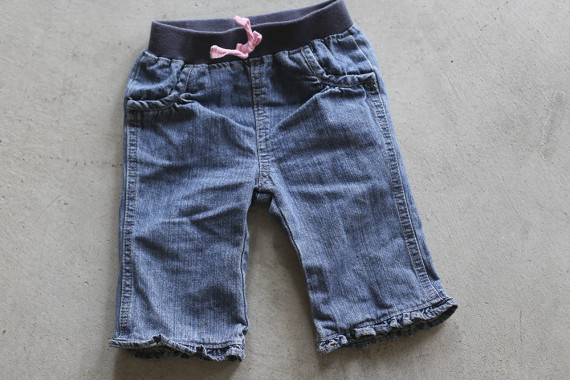
Step 4. Next you’ll need to create your waistband. First, cut a piece of elastic for your waistband. I measured the original elastic waistband and then cut my elastic the same size but you can also cut a piece of elastic using your child’s exact waist measurement. I found an old t-shirt and cut my ribbing so that the width was two times the width of the my elastic and then leaving another inch for the seam allowance. My elastic was 1 1/2 inches so I cut the t-shirt at 4 inches (1.5 inches x 2 plus 1 inch for the seam allowance). The length of the ribbing was the same as the length of the elastic plus another inch for the seam allowance. And now you have a nice pair of baby jeans!

Step 5. The final step is to finish the waistband. You’ll want to sew the short ends of the t-shirt/ribbing together to make a large circle as well as sew the short ends of the elastic together. Next, I folded the t-shirt/ribbing (right side out) in half around the elastic so the elastic was inside of the ribbing. Pin the t-shirt/ribbing around the elastic and carefully sew the t-shirt. Finally, turn your jeans inside out, pin the ribbing around the waist of the jeans so the both ends are together and sew it on. I went back with a basic serger stitch to make sure the ribbing and the top part of the jean wouldn’t fray and held together nicely.


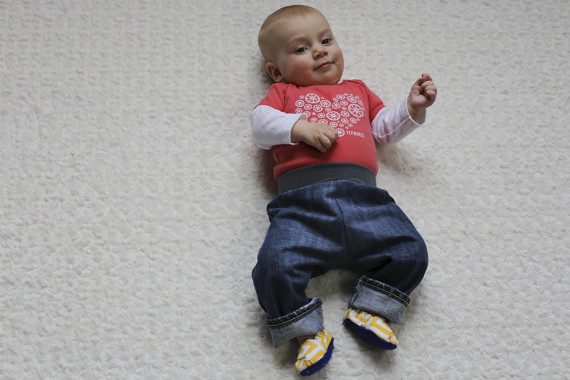


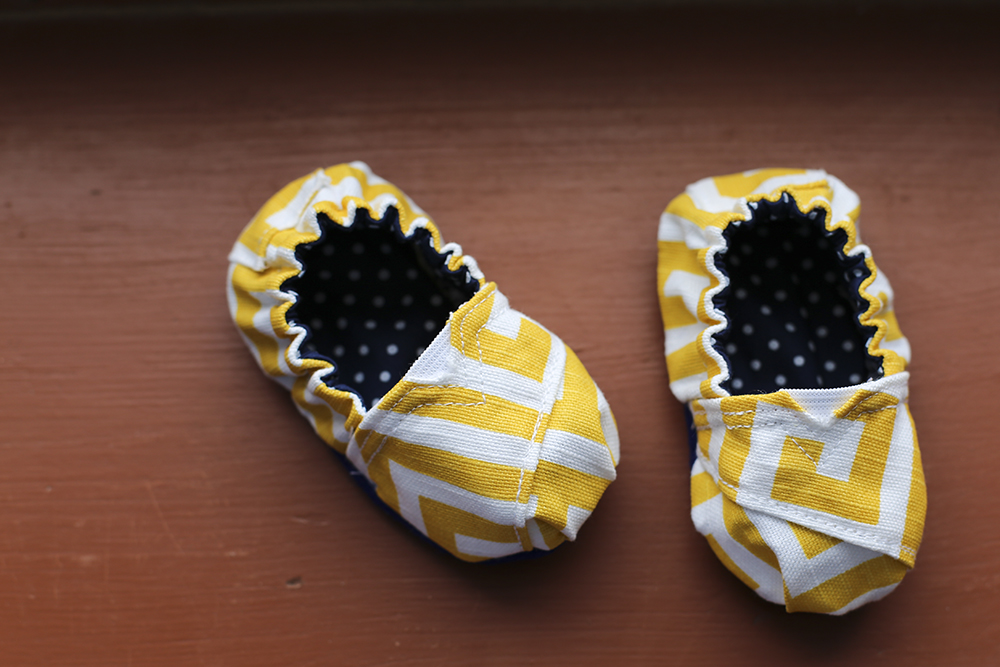
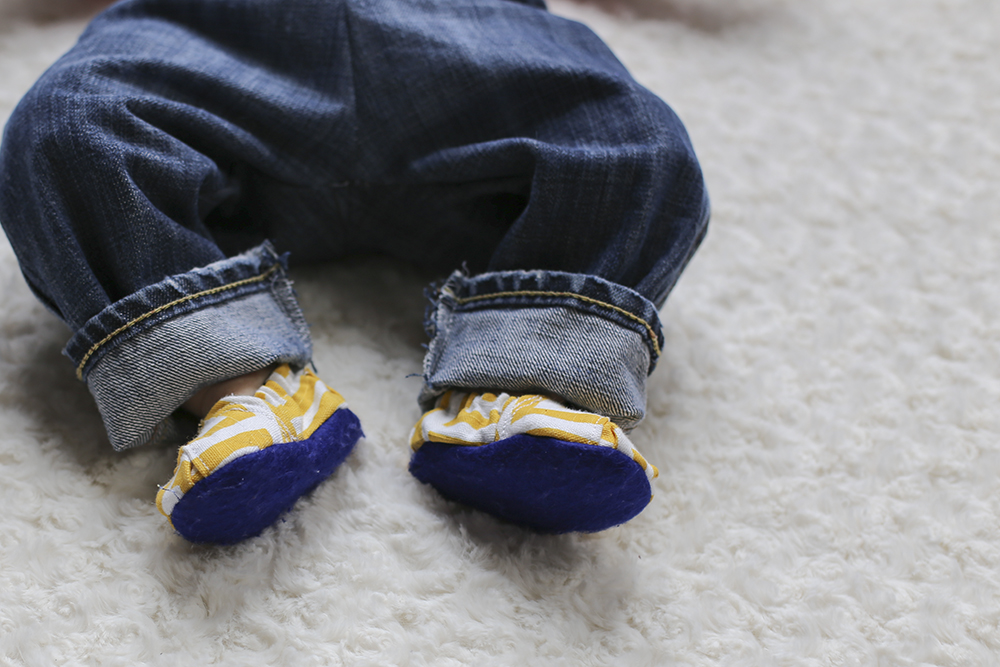
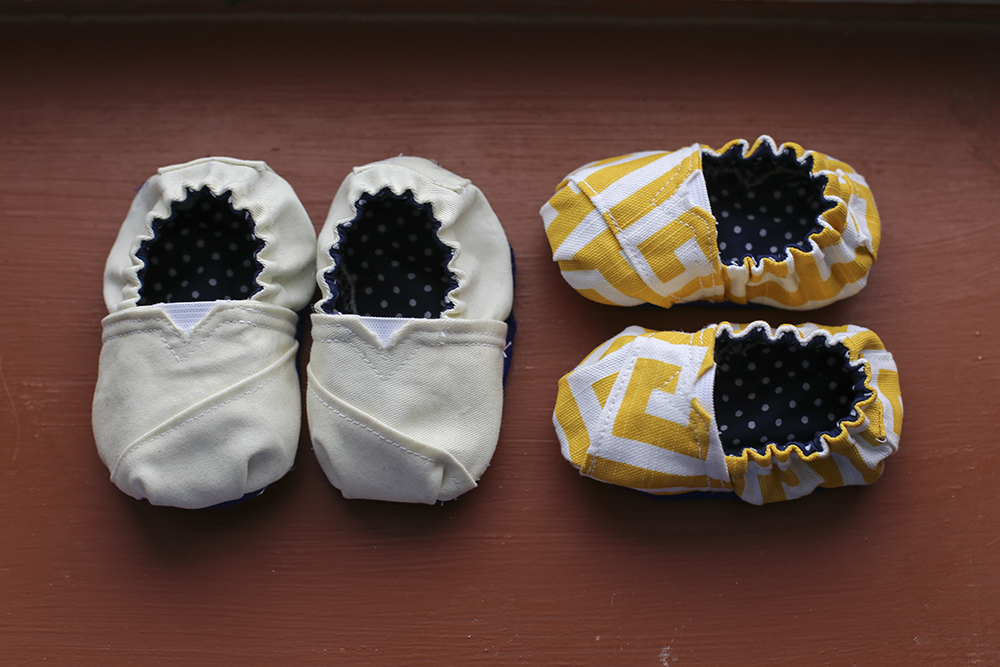
I know that Annabelle isn’t in need of shoes but I found an awesome pattern and tutorial for TOMS inspired baby shoes the other day. I just happened to have all of the materials so while Annabelle was taking a couple of naps I attempted to make her some adorably cute shoes. The tutorial was very detailed and so easy to follow!
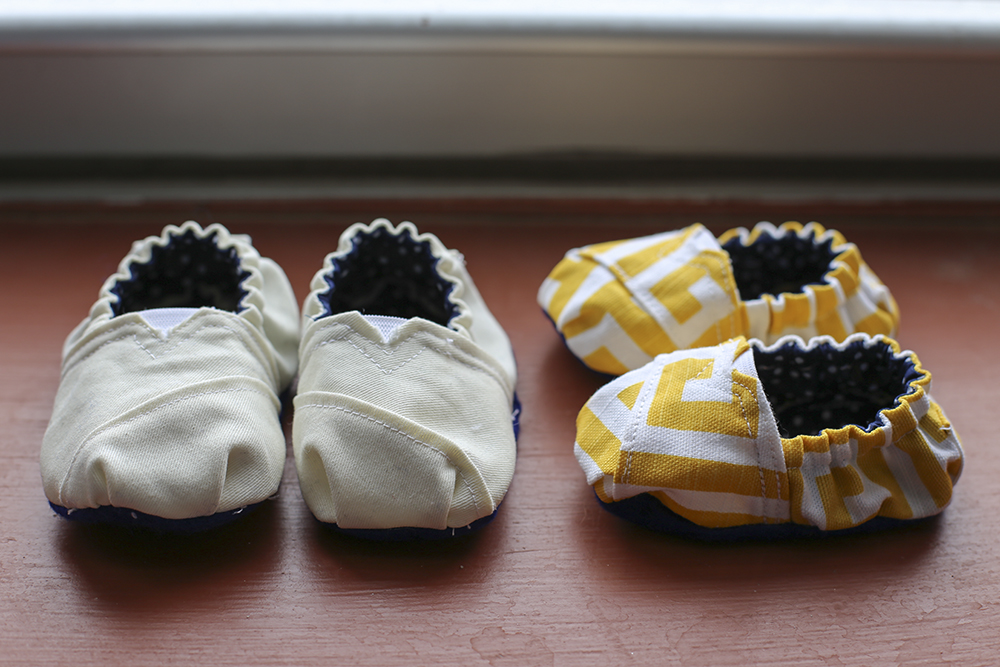
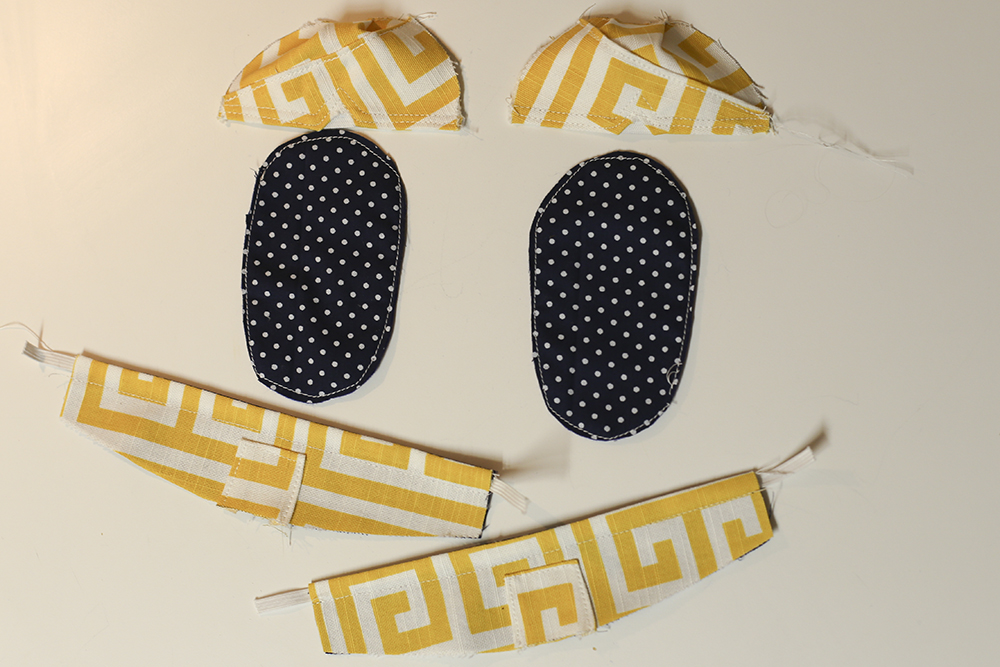
I used the free General Baby pattern. I’ve made three pairs and have finally gotten the right size for our little lady. I printed the pattern at 100% and it was too small, then I tried printing the pattern at 120% and it was too big. Then I tried 110% and the shoes ended up being just perfect for Annabelle. For anyone wanting to try to make some, Annabelle’s 6 months old and printing at the pattern 110% made shoes that we just a little big so she can grow into them and wear them with socks. The original pattern created shoes that fit her perfectly with no socks but her little toes had no room to move.
Just a few other notes for anyone trying to make your own TOMS look-a-likes, I used felt for the soles of the shoes and am very happy with the quality. If she was crawling I might try using soft leather or something a little more durable. I used a cotton fabric for the lining and a soft canvas fabric for the outside. I didn’t worry about all of the tags that the other TOMS inspired baby shoes have.

My latest quilting project. A beautiful pink and orange baby blanket that I gave to friends who just recently had a beautiful little girl, Elsie. I went to visit momma and baby to give them the quilt and was reminded of how much Annabelle has grown in the last five plus months. Elsie slept in momma’s arms the entire time I was there.
What I love about this quilt is that I actually didn’t see the pattern in the quilt until I took pictures of it. As I was making it I created two types of squares. One that was striped neutral, pattern, neutral and the other that was striped pattern, neutral, pattern. Then as I sewed the squares together I alternated the squares and direction they went in. I never noticed the I’s or dumbbell pattern I created until after sewing the entire quilt.
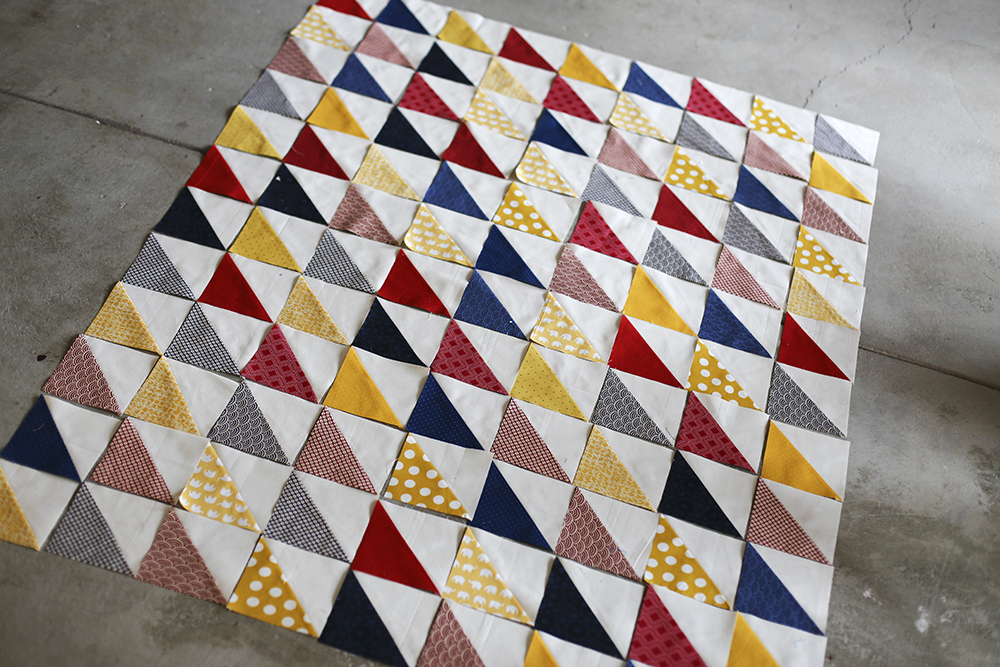


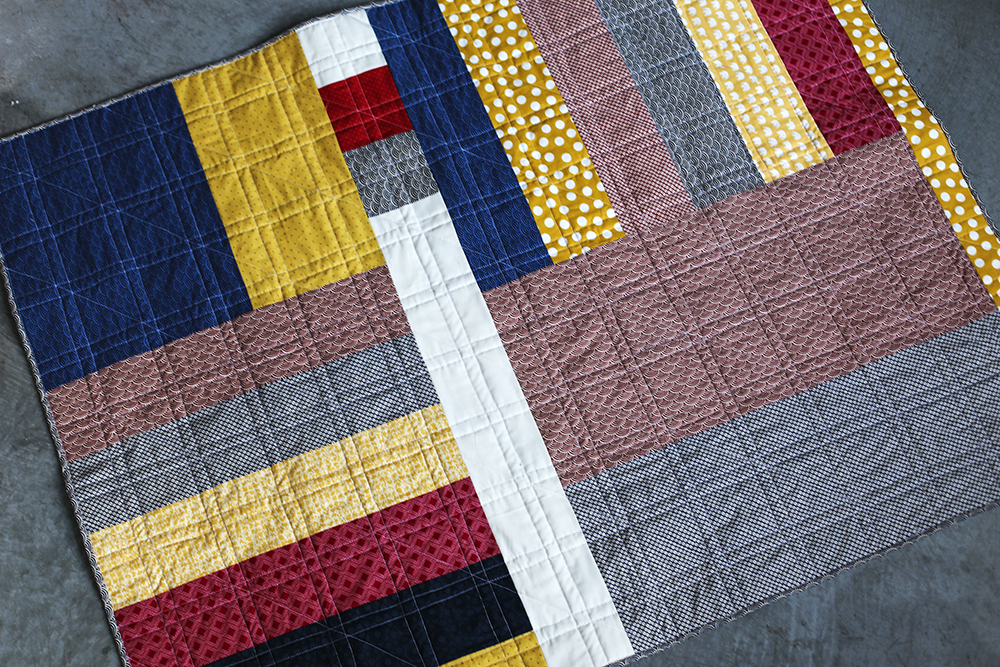
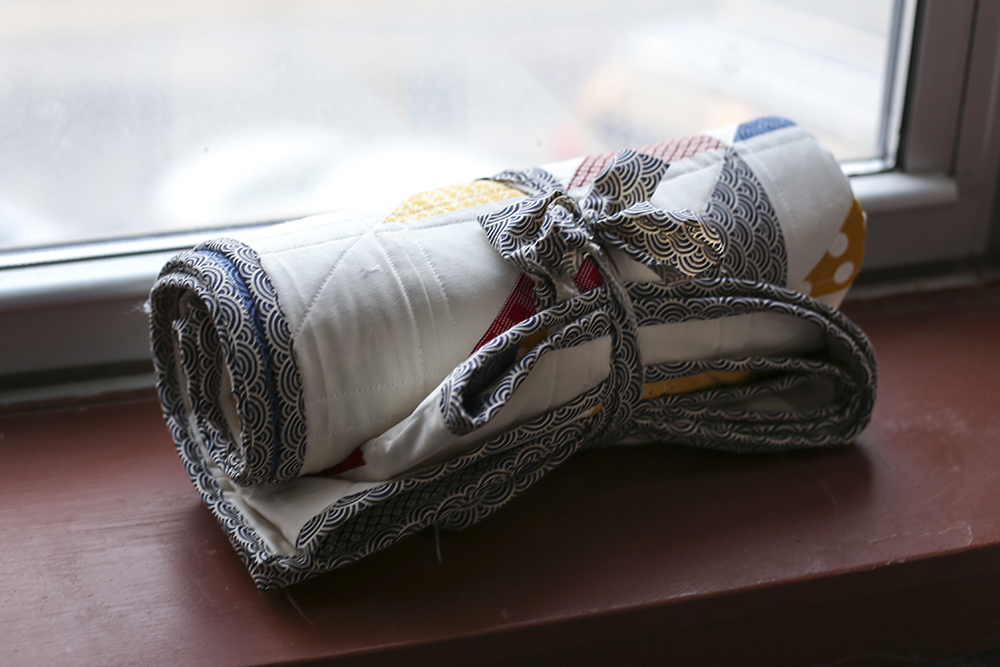
I recently gave this quilt to friends of ours who are having a precious baby boy in February. I’m in love with all of the different patterns you can create with simple triangles.
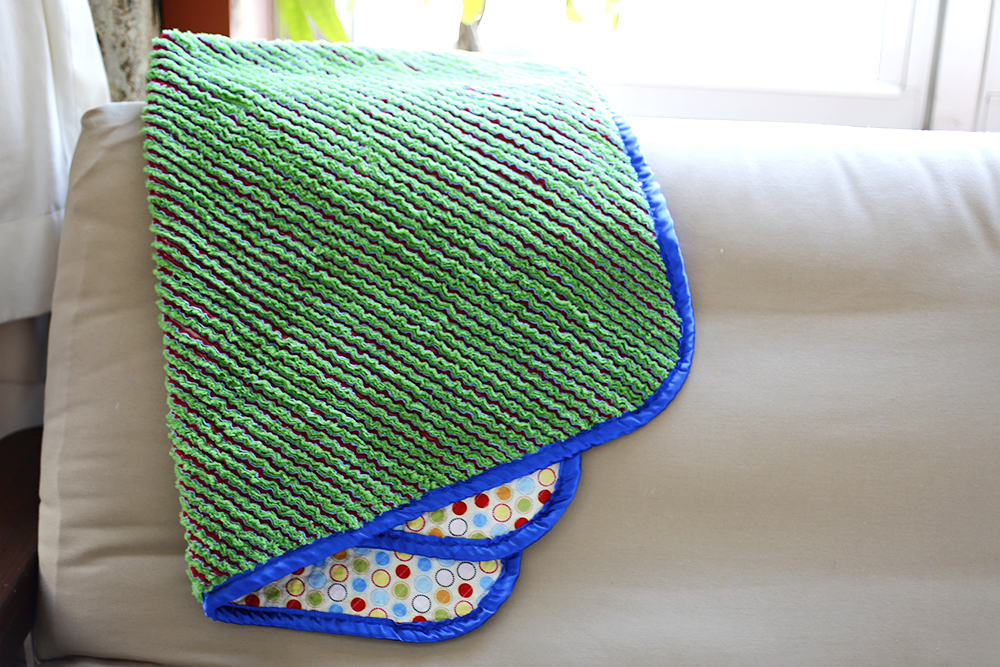
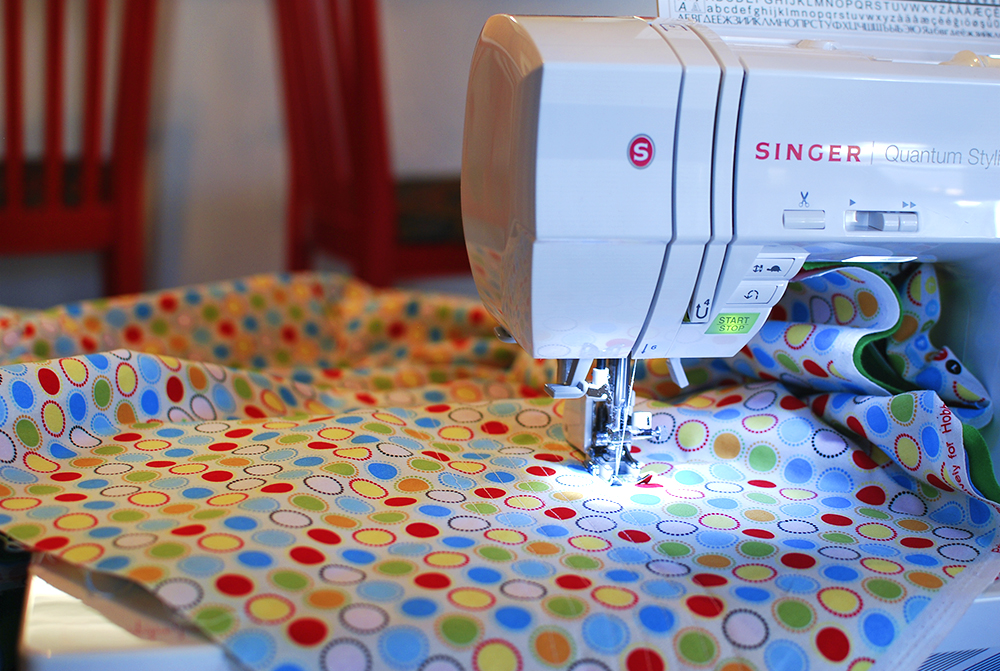
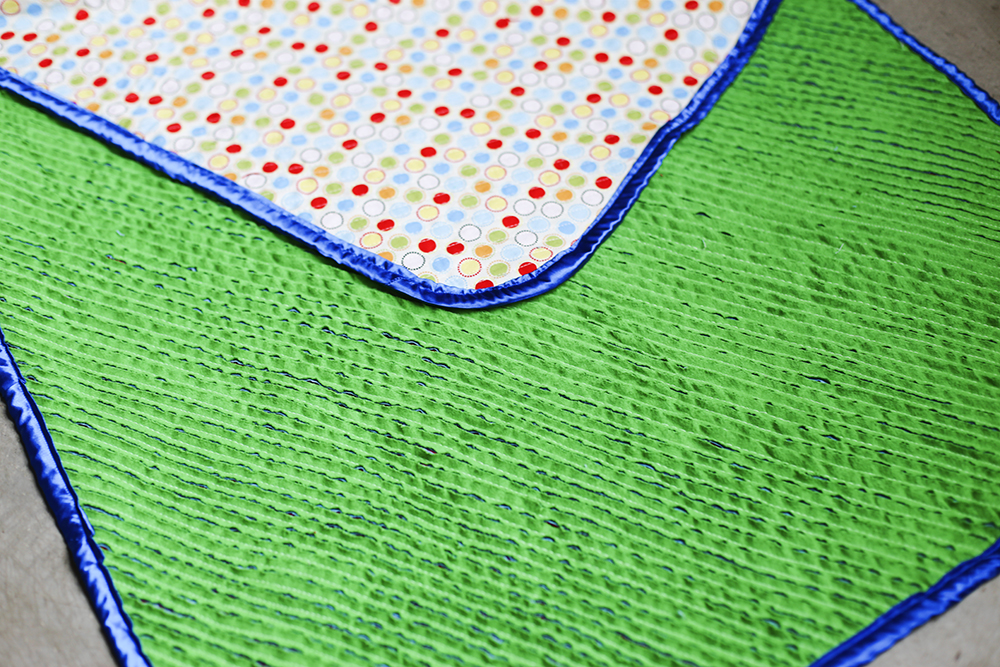
Since I’ve had Annabelle I don’t have nearly as much time to quilt so when I saw a tutorial for this chenille baby blanket I thought it was the perfect project. All it includes is four pieces of fabric (3 pieces of flannel and one piece of cotton fabric) and sewing straight lines. It did end up being a great project because I could sew a few lines during nap time. And then when everything was sewn I just spent my free time cutting. I used scissors but if I ever make this blanket again I’ll buy a Olfa Chenille Cutter to make it go faster.
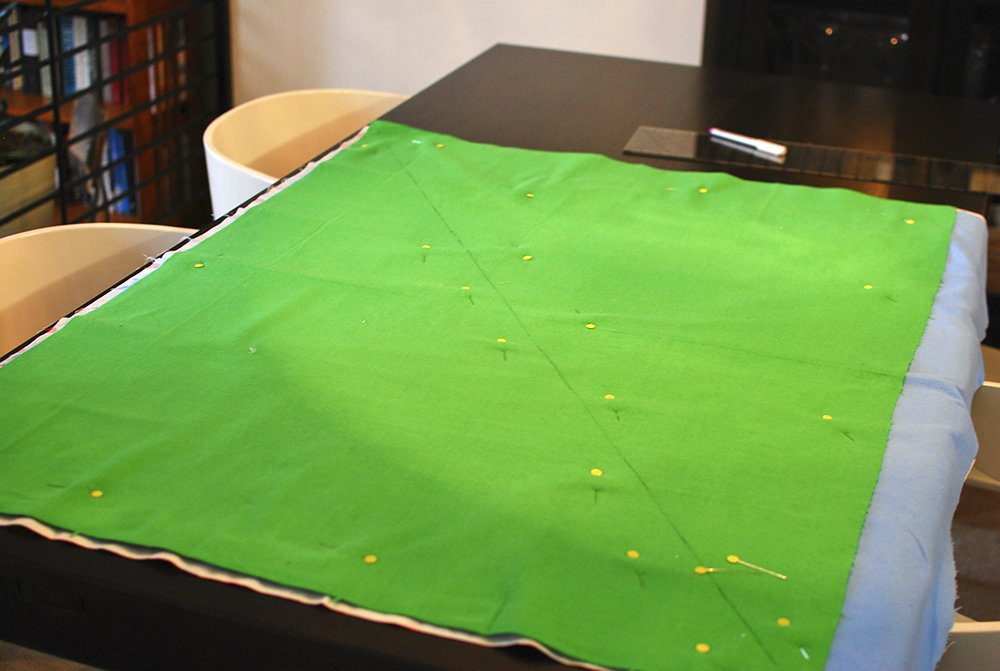
 Before quilt was washed
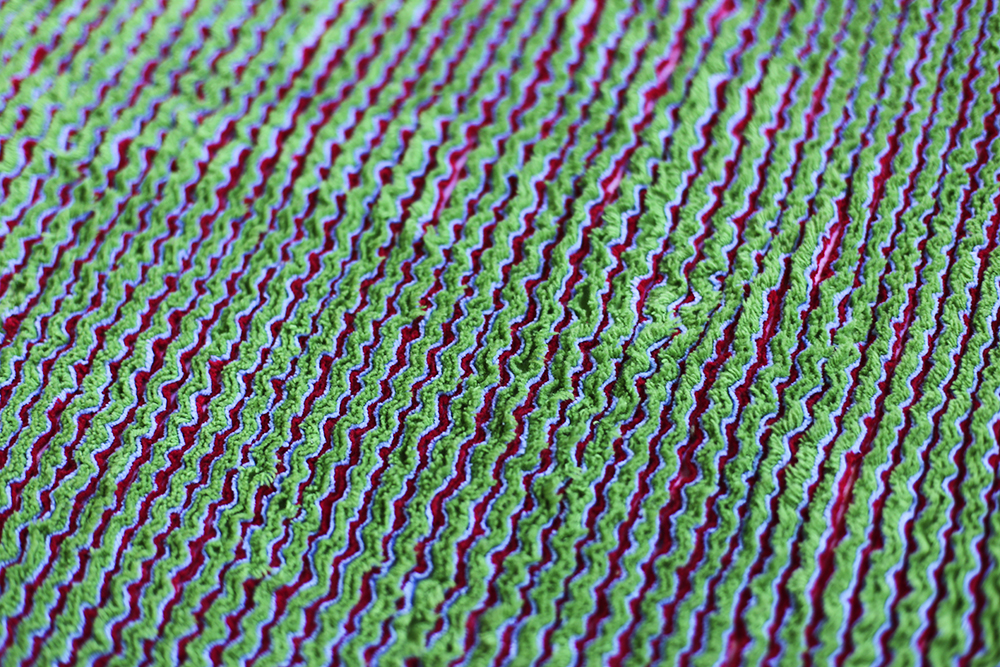 After quilt was washed

If I ever make this type of quilt again I’ll purchase coordinating flannel fabrics (something closer to the colors in the tutorial I followed would be good). These were colors I already had and thenI found the cotton fabric in my stash as a well. I think this particular quilt would be great for a baby boy.